 Materials Needed:
Worsted Weight Yarn (I used Redheart)
H Sized Hook
2 buttons
Needle
Directions:
Start w/ a magic ring and 8 dcs in the ring, then pull the yarn tail & sl st in top of 1st dc, ch 2.
Rd 2: 2 dc into each stitch, sl st into top of the first dc, ch 2.
Rd 3: 1 dc into same stitch as ch 2, 2 dc into next st, *1 dc into next st, 2 dc into next* repeat around, sl st into top of the first dc, ch 2.
Rd 4: 1 dc into same stitch as ch2, 1 dc in next stitch, 2 dc into next st, *1 dc into each of the next 2 sts, 2 dc into the next stitch* repeat around, sl st into top of the first dc, ch 2.
Rd 5 & 6: dc in each st around, sl st into 1st dc & ch 2.
Rd 7: dc into the first 23 sts, leaving the remaining sts unworked. Ch 2 and turn,
Rd 8-20: repeat rd 7.
Rd 21: Dc into first 10 sts, dc3tog, dc in the remaining sts.
Now fold right sides together and sl st from top down to the bottom of the heel.
Join yarn at the back of the slipper, sc in that stitch & sc around the slipper opening. When you reach the top corner (near toes) sc3tog, continue sc across top and sc3tog in opposite corner, then continue sc around the rest of the slipper until you reach where you started then sl st in the 1st sc you made.
Now we are going to sc around once more. SC2tog, then sc around to the top corner again, sc3tog, continue sc across top, and sc3tog in opposite corner, then continue sc around the rest of the slipper until you reach where you started then sl st in the 1st sc you made. Fasten off.
((You are making the slipper tighter fitting with these steps, so basically decrease at the heel and the top corners.))
The next step you can either use the same color or another color choice of yarn. You can also choose either to have a strap & button or leave your slippers without. If you decide not to have a strap then just sc around the entire slipper again following the above steps.
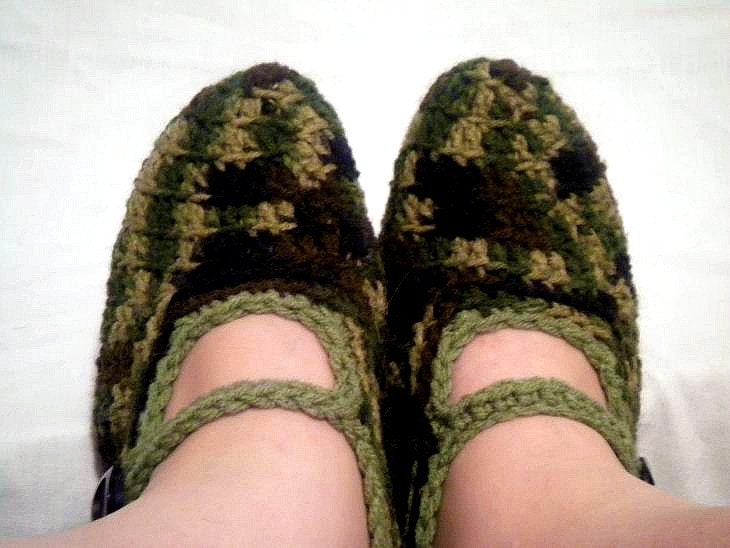
If you would like a strap and button following these steps:
Join yarn at the back center of the heel. SC in same st. Sc around until you reach where you want your strap to come across the top of the foot. Ch 17. Skip 1st 7 of the chain (this makes the button loop), DC in 8 remaining sts down to the bottom of your ch. Join with a sl st in the st before your 1st ch. then continue sc around the slipper, when you reach your beginning sc, join with a sl st. Fasten off & weave in all ends.
Attach your button across from the strap and you're done!
Would love to see your creations using this pattern! Please give credit where credit is due, thank you! Enjoy!

